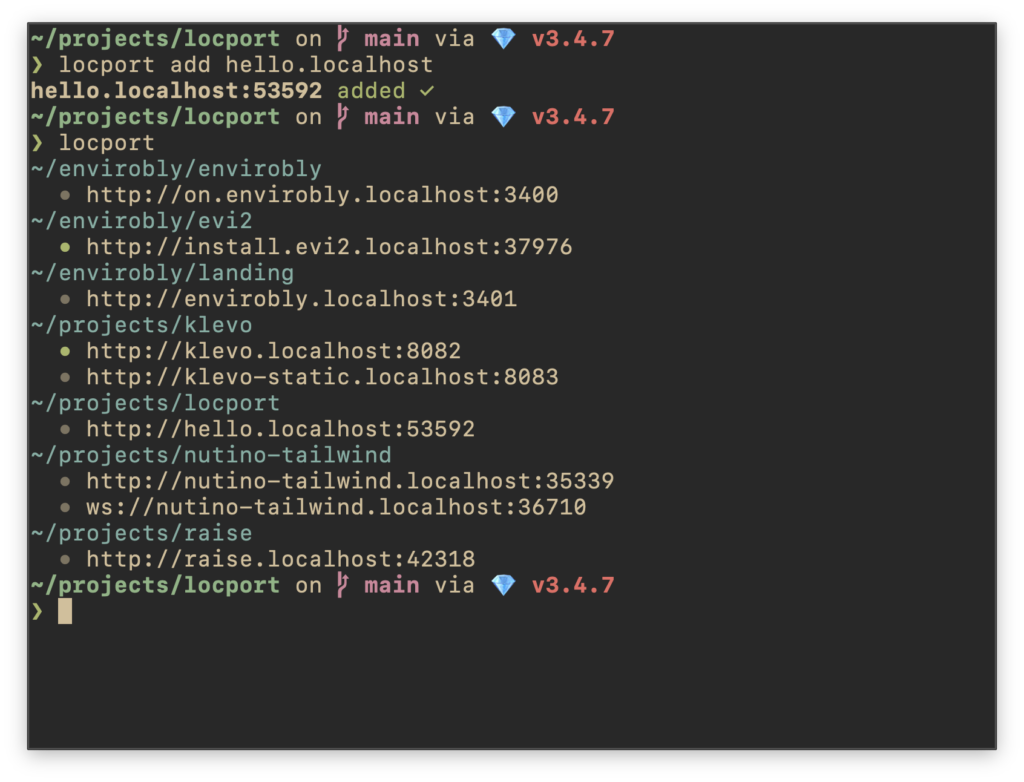
locport v1.2.0 released with listening port indicators

I’m proud to release v1.2.0 of locport, my open-source tool to standardize localhost project port management.

This version introduces:

  • Neater listing of projects and their hostnames.
  • Next to each hostname there is an indicator as to whether that port is listening, so you know which of your projects/apps are running.
  • Port or host conflict messages point you to the file where the conflict originates.
  • Automatic port assignment now checks for whether the selected port is not already listening, no matter whether indexed by locport.
  • Test suite and CI coverage of the existing functionality.

To install the latest version simply do:

gem install locport

tmux: reload bash config across all panes and sessions

Yesterday I got myself into tmux and I love it!

tmux is a terminal multiplexer. It lets you switch easily between several programs in one terminal, detach them (they keep running in the background) and reattach them to a different terminal.

I’ve been using Zellij for several months prior to this. Which I must thank for getting me introduced to the world of terminal multiplexers. However I’ve been running into several issues with it, that got me looking for an alternative:

  • Session manager entires keep shifting and popping in and out randomly. This is the most frustrating thing, probably number one cause for me to look for a change.
  • Occasional crashes during session switching.
  • No ability to toggle between last two used sessions.
  • No number hotkey assignment for tabs.
  • Need to match Zellij theme with your terminal theme. They are two separate things.

The switch

A fantastic start into tmux are these two videos from typecraft over at YouTube. The basics are wonderfully explained there as well as some key configuration. This got me going immediately.

Here’s a documented .tmux.conf a arrived at after a day or two:

# Settings

# Change leader key to something more ergonomic
# Note: On MacOS disable the shortcut to change keyboard input language first in Settings.
set -g prefix C-Space
# Allow mouse interactions like focusing windows and panes and resizing
set -g mouse on
# Simplify the status bar look: white text on black background
set -g status-style bg=black,fg=white
# Disable hostname, date and time display in the status bar
set -g status-right ""
set -g status-position top
# Use vim style navigation
set -g mode-keys vi
# Number windows starting from 1, instead of 0
set -g base-index 1
# When window is closed, refresh the numbering
set -g renumber-windows on
# Change the look of session name in the status bar
set -g status-left "#[fg=blue]#S#[default] #[dim]โ†’#[default] "
# Do not truncate session names too early
set -g status-left-length 100

# Keybindings

# Shortcut for live reload of tmux config
unbind r
bind r source-file ~/.tmux.conf

# Last session toggle
bind S switch-client -l

# Maximize pane
bind z resize-pane -Z

# vim like pane navigation
bind h select-pane -L
bind j select-pane -D
bind k select-pane -U
bind l select-pane -R

# Set new windows and panes in the current directory
bind c new-window -c "#{pane_current_path}"
bind '"' split-window -c "#{pane_current_path}"
bind % split-window -h -c "#{pane_current_path}"

Superpowers: issuing commands to all panes in all sessions

I almost forgot what I wanted to write about initially. So here’s a ready made alias I use to reload bash config across all my tmux bash sessions. This is sooo useful when I for example add something like a new alias in my .bashrc. Previously I’d have to manually source the config in each pane where I’d want to use the alias, which is a pain. Now it’s just one command:

alias reload-bash-config-in-bash-panes=$'tmux list-panes -a -F \'#{session_name}:#{window_index}.#{pane_index} #{pane_current_command}\' | awk \'$2 == "bash" {print $1}\' | xargs -I{} tmux send-keys -t {} "source ~/.bashrc" C-m'

This ensures the source command is only executed in panes that are running “bash”. It won’t affect your neovim instances for example, or other programs where it could cause unintended consequences.

Layouts: GitOps for workspaces

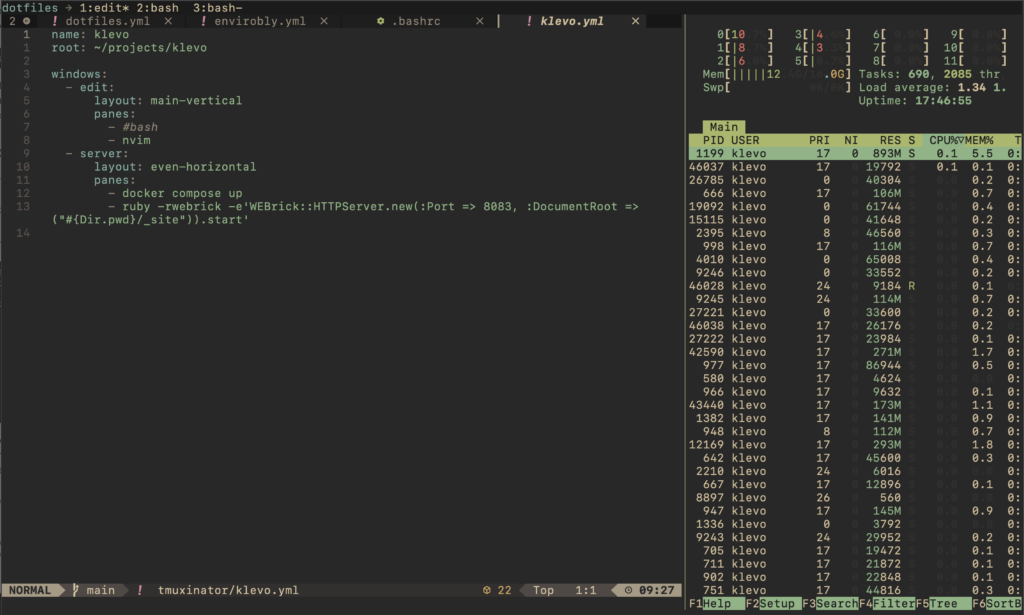
In Zellij, layouts are build in and a wonderful feature. In tmux land, there is tmuxinator–a separate program–that handles layout definition via YAML files and starting sessions based on those layouts. It’s simple and I got going with it immediately.

Here’s a layout I use to run this blog in development environment:

name: klevo
root: ~/projects/klevo

windows:
  - edit:
      layout: main-vertical
      panes:
        - #bash
        - nvim
  - server:
      layout: even-horizontal
      panes:
        - docker compose up
        - ruby -rwebrick -e'WEBrick::HTTPServer.new(:Port => 8083, :DocumentRoot => ("#{Dir.pwd}/_site")).start'

tmux and neovim are the two things I wish I learned much earlier in my career. Mastering these tools provided an immense ergonomic boost to my workflows. It’s a joy to fly through projects and tasks in a fast, consistent, repeatable and simple environment, exactly suited to my needs.

My current tmux configuration running inside Ghostty terminal.

Enable IPv6 connectivity to and from containers deployed with Kamal

At the moment, Kamal doesn’t support IPv6 out of the box. Meaning your containers won’t be able to reach IPv6 hosts at all. IPv6 support is expanding, and on some of my projects, I need such connectivity. Taking Kamal for a ride, I’ve run into this issue and had to solve it.

I’ll show you how to do this, both with an already deployed app, as well as if you haven’t run “kamal setup” just yet.

Already deployed app

There will be a short downtime (couple of seconds) while you do the switch. So plan for that.

All we need to do is to recreate the kamal Docker network, which is created with IPv4 support only, by Kamal. The problem is, you can’t remove a Docker network if containers are attached to it.

Here’s a script that reconnects the containers to a temporary network, recreates kamal network with IPv6 support, connects the containers back to it and cleans up. During this, there will be a few seconds of a downtime, as your containers will briefly loose connection to the network and/or between each other.

#!/usr/bin/env bash
set -euo pipefail

OLD_NET="kamal"
TEMP_NET="kamal_tmp_v6"

echo "Collecting containers connected to network '$OLD_NET'..."
CONTAINERS=$(docker network inspect "$OLD_NET" -f '{{range .Containers}}{{.Name}} {{end}}')

if [ -z "$CONTAINERS" ]; then
  echo "No containers found on network '$OLD_NET'."
  exit 1
fi

echo "Creating temporary IPv6-enabled network '$TEMP_NET'..."
docker network create \
  --ipv6 \
  "$TEMP_NET"

echo "Connecting containers to temporary network..."
for c in $CONTAINERS; do
  echo " โ†’ Connecting $c to $TEMP_NET"
  docker network connect "$TEMP_NET" "$c"
done

echo "Disconnecting containers from old network '$OLD_NET'..."
for c in $CONTAINERS; do
  echo " โ†’ Disconnecting $c from $OLD_NET"
  docker network disconnect "$OLD_NET" "$c" || true
done

echo "Removing old network '$OLD_NET'..."
docker network rm "$OLD_NET"

echo "Recreating network '$OLD_NET' with IPv6 enabled..."
docker network create \
  --ipv6 \
  "$OLD_NET"

echo "Reconnecting containers to new '$OLD_NET'..."
for c in $CONTAINERS; do
  echo " โ†’ Connecting $c to $OLD_NET"
  docker network connect "$OLD_NET" "$c"
  echo " โ†’ Disconnecting $c from $TEMP_NET"
  docker network disconnect "$TEMP_NET" "$c" || true
done

echo "Cleaning up temporary network '$TEMP_NET'..."
docker network rm "$TEMP_NET"

echo "โœ… IPv6 successfully enabled on '$OLD_NET' and containers reattached."

Copy it anywhere on your server, for example ~/enable_ipv6_on_kamal.sh, make it executable and run it:

chmod +x enable_ipv6_on_kamal.sh

# Run it
./enable_ipv6_on_kamal.sh

You’re done. After a few seconds you should be able to access your app, as kamal-proxy succeeds with it’s health checks.

Before your first deployment

This is easier. On the host, just create the Docker network Kamal expects manually, and Kamal will use that once you start deploying.

docker network create --ipv6 kamal 

That’s all! Now you can run kamal setup from your developer machine and you’ll have IPv6 connectivity from and to your containers right away.
Enabling initramfs on AWS EC2

Modern EC2 instances on AWS boot without invoking initramfs by default. So if you want to do things like repartition your disk, where the root partition is, you’ll be scratching your head why your initramfs hooks aren’t loading.

After an hour or two of debugging, I figured out an easy way to enable it. This is tested on Ubuntu 24.04 LTS:

sudo rm /etc/default/grub.d/40-force-partuuid.cfg
sudo update-grub
sudo grub-mkconfig -o /boot/grub/grub.cfg

# On the next reboot initramfs will run
sudo reboot

Enjoy.

Envirobly – Efficient application hosting platform

Envirobly is a startup I solo founded and launched in October 2025. It’s a culmination of an intense 3 year work, crafting an ideal platform to deploy web applications to, while keeping the costs manageable.

Check out the website to learn more.

Mentions

locport – Manage localhost ports

There are many solutions to the problem of running multiple (web) applications on the same machine, during development. You can use various proxies (puma-dev, localcan, traefik, nginx…) and DNS to set up custom hostnames. Which is something I’ve been doing in the past. But there is a more direct and simpler approach.

Modern browsers all support .localhost domains and treat it as a secure context (like it would be served over HTTPS), which is required for things like copy to clipboard from JavaScript. You can freely assign names to you apps, like app1.localhost, app2.localhost, but each one needs a unique port too.

If you have lots of apps, you need to keep track of all these ports and prevent conflicts. This is where locport comes in. It’s a simple command line program. It introduces a .localhost file convention, which you place in each project’s folder and define the hostnames and ports there. locport indexes these files and gives you an overview of all your apps and let’s you know if there are any conflicts.

If you have Ruby installed, you can just:

gem install locport

# Show usage instructions
locport help

Learn more over at GitHub.

iOS 26 variable web font weight issues

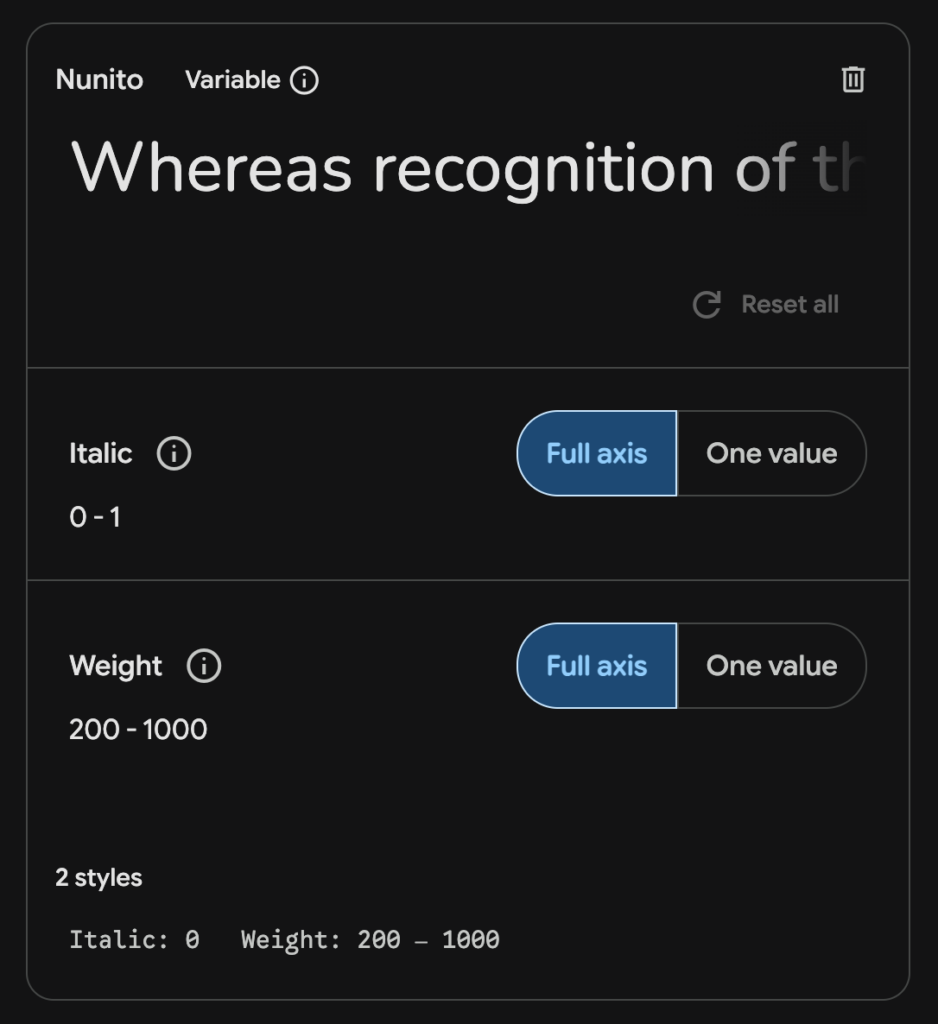
iOS 26 is able to display web fonts in Lockdown mode, with certain limitations. One of these seems to be an issue with web fonts, with variable font weight, which is the default when grabbing an embed code from Google Fonts:

Default Google Fonts embed configuration for variable weight fonts.

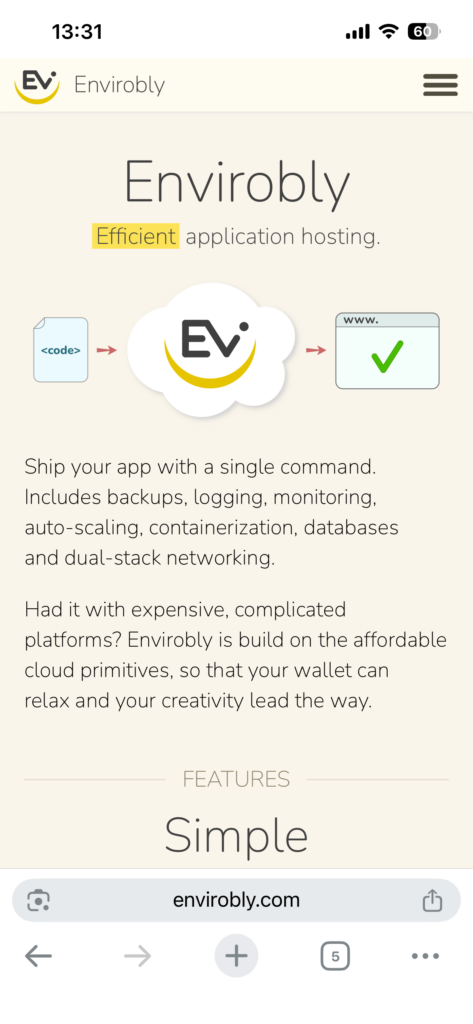
This works perfectly on the desktop, for all major browsers I’ve tested (Chrome, Safari, Firefox). However I’ve run into an issue, with Nunito font specifically, on the recently released iOS 26, where it would render everything in a single, light font weight, like so:

All font-weight from headings and strong tags is missing.

This is in Lockdown Mode and the embed code looks like this:

<link rel="preconnect" href="https://fonts.googleapis.com">
<link rel="preconnect" href="https://fonts.gstatic.com" crossorigin>
<link href="https://fonts.googleapis.com/css2?family=Nunito:ital,wght@0,200..1000;1,200..1000&display=swap" rel="stylesheet">

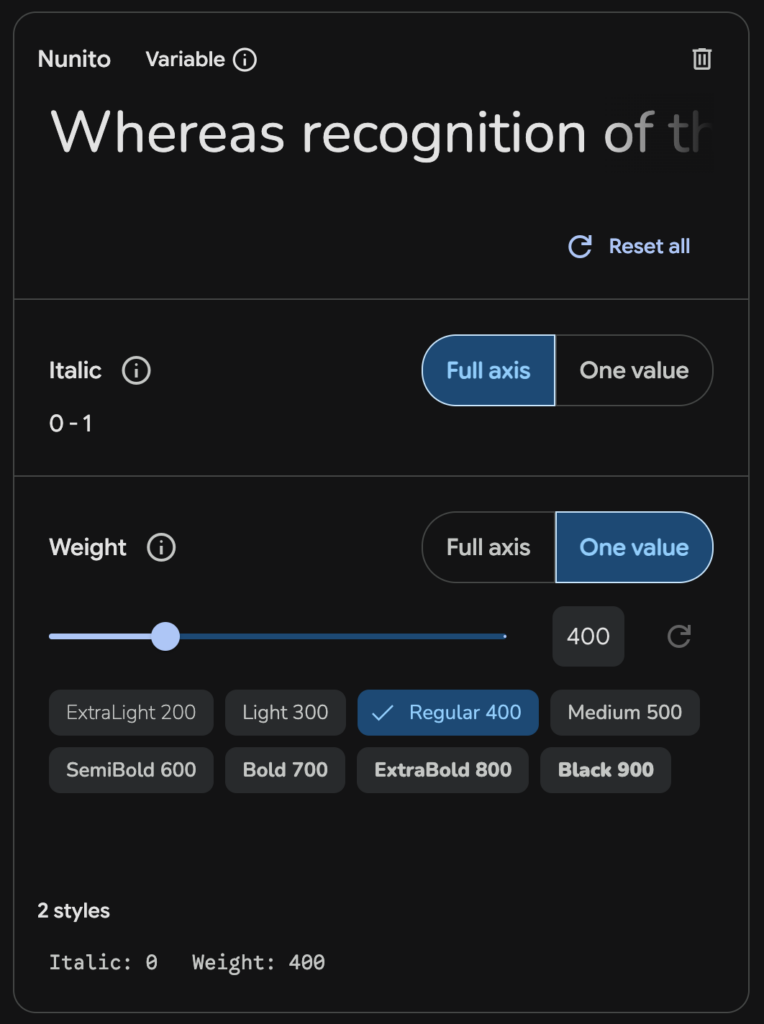
I experimented a lot with various font- CSS properties, but nothing helped. Then I tried the single font weight embed, instead of variable and got it working ๐Ÿฅณ

Embed configured for single font weight.

The trick is to grab all the embed codes, for all the weights you use on your site and combine them, like so:

<link rel="preconnect" href="https://fonts.googleapis.com">
<link rel="preconnect" href="https://fonts.gstatic.com" crossorigin>
<link href="https://fonts.googleapis.com/css2?family=Nunito:ital,wght@0,200;1,200&display=swap" rel="stylesheet">
<link href="https://fonts.googleapis.com/css2?family=Nunito:ital@0;1&display=swap" rel="stylesheet">
<link href="https://fonts.googleapis.com/css2?family=Nunito:ital,wght@0,700;1,700&display=swap" rel="stylesheet">
<link href="https://fonts.googleapis.com/css2?family=Nunito:ital,wght@0,800;1,800&display=swap" rel="stylesheet">
<link href="https://fonts.googleapis.com/css2?family=Nunito:ital,wght@0,900;1,900&display=swap" rel="stylesheet">

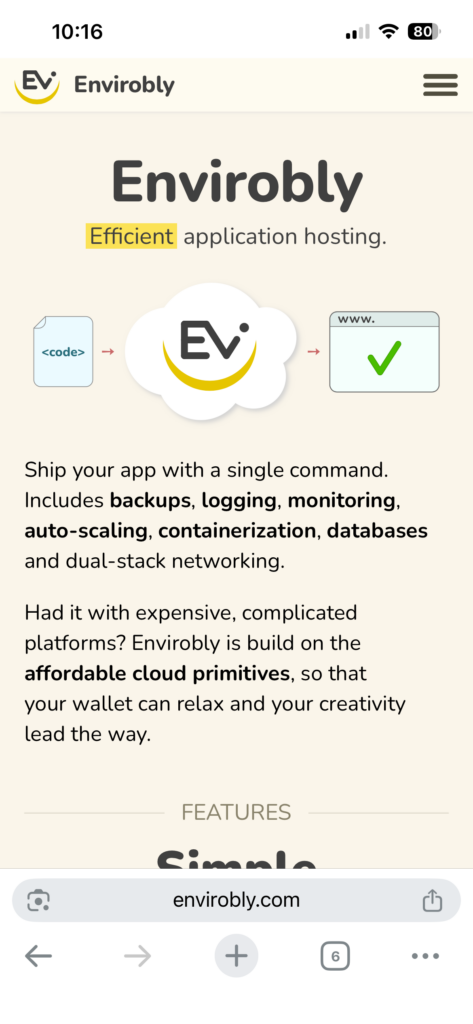
Now iOS 26, in Lockdown Mode, renders the custom web font and all the font weights properly:

tinyups3 – streaming S3 uploader

Working with the official AWS S3 CLI, as well tools like s5cmd I quickly realized they aren’t optimized for resource constrained systems, rather more towards uploading as fast as possible and in parallel. This is great for most use cases, but not when you want to minimize the impact on the system, like during frequent backup operations and on a system with half a gig of memory for example.

I dusted off my Go tools and build a simple tool to serve this purpose. Say hello to tinyups3 – streaming S3 uploader optimized for minimum CPU and RAM usage. It’s a single binary, open sourced under the MIT license.

Head over to GitHub for installation and usage instructions.

Happy uploading!

testerobly – lightweight automatic test runner

I’ve been running into issues, like intermittent crashes, with guard, which is a favorite amongst Rubyists, when it comes to automatically running unit tests on a file change. I’ve decided it would be a fun exercise to create my own tool, addressing my needs specifically:

  • Listen for file changes and run matching tests.
  • Customize configuration per project.
  • Pause during git operations like checkout.
  • Run all tests with Enter press.
  • Fast, simple, stable and resource efficient.
  • Can be used together with interactive debug mode.

I’ve achieved that goal with testerobly which I published as a Ruby gem, under the MIT license.

I’ve been using it for many months now, on quite a few projects and it has been delightful. It does exactly what it says it does and gets out of the way.

Go check it out.

Recent open source contributions in the Turbo ecosystem

I’ve been pushing Turbo hard the past couple of months. That resulted in running into some edge case scenarios, which have not yet been resolved in the library.

One is an annoying race condition, related to incoming turbo refreshes stealing the navigation to another page. At the time of writing still waiting for merge. (Update: itโ€™s merged now ๐Ÿฅณ)

The other one, just merged to main, is an improvement to turbo-rails documentation, which came out of the above work too.